Bosses can be found randomly in every level of Vagante, they are stronger and tougher than normal mobs and activate a background soundtrack when engaged. When killed they drop a Treasure Key used to open treasure chests.
Please note that the names used here are not official.
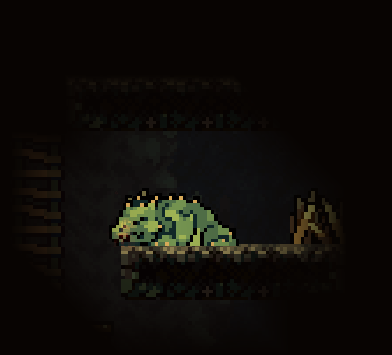
Baby Dragon
The Baby Dragon is one of the three bosses to spawn in the Dark Caves, it also spawns in a pair in The Catacombs.
It has around 75 HP.
Behavior
Initially sleeping, it will wake up when the player gets close to it. At times, it's capability of flying might make the fight harder for melee characters.
Attacks
| Attack | Description |
|---|---|
| Dive | The Dragon does a dive to the ground, stunning players if they're touching the ground. |
| Enrage | After losing half of it's health, the dragon gets a red hue, moves faster and spits fire more quickly. |
| Spit Fire | The Dragon stands still and spits 3 fireballs in succession. |
Strategy
Try standing behind an obstacle when the Dragon is spitting fire and getting close to hit it just after it spits a third fireball, but be wary that they can start spitting fire again immediately. Fighting it on small maps spaces is probably best as that gives you obstacles to hide behind and you can quickly get close to the dragon to attack it.
The dragon's fireballs cannot hurt you while underwater, so if it is in, you can attack it without consequence. Be aware that the more fire the dragon shoots, the water slowly decreases. Therefore, if you are in shallow water, it may dissipate until the fire can hurt you again. (This fire immunity in water is not effective against the fire shot from divebomber minions.
The fireballs do not deal damage when the Hero has +3 fire resistance or the fire shield spell active, rendering the Dragon effectively harmless.

Dragon sleeping

Dragon spitting fire

Goblin
The Goblin is one of the three bosses to spawn in the dark caves.
It has around 75 HP.
Behavior
Will summon goblins as soon as it takes aggro on the player. The Goblin moves a lot from left to right and might
Attacks
| Attack | Description |
|---|---|
| Grab | The Goblin lunges forward, if a player is in its way, the Goblin will grab them and throw them far away, dealing damage based on distance from the impact point. |
| Charge | The Goblin will pause for a second and then charge forward until it hits an obstacle briefly stunning itself. |
| Stomps | The Goblin jumps up and down stomping the ground 3 times and will deal contact damage while doing so. The screen shakes and the player might have difficulty jumping due to the stomps. |
| Summon Goblins | The Goblin summons 2 smaller goblins to its aid. |
Strategy
It is recommended to fight this boss somewhere where you have a lot of horizontal mobility
The Goblin has a lot of down time after lunging forward, that's a good time to strike, but be careful as there's not much time to react to another attack if it comes to it. The Boss tends to telegraph its attacks about half a second before he does them, jumping is usually good enough (especially with a double jump or high jump) to evade his charge and grab attacks if timed correctly. When he is about to charge, he will position his axe higher than normal, in front of his body. When about to do the grab attack, he holds his axe slightly lower than its usual and emits smoke particles behind him. The best way to fight him is to see if it telegraphs its charge attack or his grab attack and jump before each attack and striking after each attack during the delay between them.
There is no telegraph of the jump attack, which is usually (but not always) done in quick succesion after each attack if the player gets too far away

Goblin Boss


Worm
The Worm is one of the three bosses to spawn in the Dark Caves
It has around 75 HP.
Behavior
The Worm appears after a player kills 3 worms.
Attacks
| Attack | Description |
|---|---|
| Burrow | The Worm moves through the map, dealing 1-4 damage to the player if it touches them. |
| Poison Spit | The Worm stands still and spits 3 poison projectiles in succession (5 faster poison projectiles after critically harmed). The poison projectiles deal damage and poison the player. |
Strategy
The best bet is to wait until the Worm stops spitting poison, as it will stand still for a few seconds before burrowing again. The worm takes increased damage on its head, and less damage on its body. It can only move so far into open space from any wall, floor, or other environment. Therefore, if the player far enough distance from an open space before the worm is close enough to begin firing its poison, the worm will recede and move back into the surface area to come from another angle. If the player has such an environment, it can avoid the prompting the poison attacks altogether by getting far enough away that the worm is forced to recede, attacking its body as it leaves, and repeating until it dies.
Worm Poison Spit

Rainbow Slime
The Rainbow Slime is the boss of the Slime Cave.
Behavior
Initially sleeping, it will wake up when the player gets close to it. It will chase a player similar to a regular green slime.
Attacks
Its attacks animations are very similar to a green slime, except it will turn into a spiky ball much more often. Unlike green slimes, they can hurt you by from below if they jump up at you.
Strategy
Rainbow slimes are immune to spike damage.
Golem
The Golem is one of the three bosses to spawn in The Forest.
It has 250 health.
Behavior
It can't jump too high and it's usually not too mobile until it starts spinning. The Golem also harms any other enemies (besides the smaller golems) with its spinning and jumping attacks.
Attacks
| Attack | Description |
|---|---|
| Ground Smash | The Golem smashes the ground, sending a shockwave through the ground, much like the shockwave spell. |
| Spin | The Golem starts spinning like a ball. It becomes really mobile, can bounce and deals damage on touch. |
| Throw Boulders | The Golem throws boulders, just like the trapped ones, at the player. Boulders deal around 30 damage. |
Strategy
Don't try to fight it while it spins, preferably stand behind a wall and try to hit while it's standing still. Freezing it can temporarily immobilize the Golem even while its spinning, but it will continue at the same trajectory once it unfreezes.
The strongest counter is the wand of digging, which deals 50 damage per charge to all golems, and can kill this boss in 5 charges.
Extraordinarily dangerous on ledges above the Hero without boulder protection due to the instant death squashing mechanic. Though, this mechanic will kill other enemies, as well as damage enemies with its other attacks besides the boulder. Typically, the Golem will be forced to remain on the ground floor of the the Forest dungeon. Ranged attacks work well, as its movement, when not spinning, is very slow and its boulders only go so far. Arrows or long distance spells work well. Fighting the Golem in an area with many platforms above him is best as the player can jump up out of reach of attacks, gaining distance, and dropping back down to damage the Golem. Be careful though, as the Golem's Spin attack can make it bounce high up onto platforms above, so moving to a fairly high platform is safest. Further, despite looking extremely large, the Golem can spin through a space that is only 1x1. (Tested when using a Wand of Digging that destroyed terrain of 1x1 blocks. The Golem revved up his Spin and spun through to the other side.)
The Golem boss

Spriggan
The Spriggan is one of the three bosses to spawn in The Forest.
It has 200 HP.
Behavior
The Spriggan will only send its man-eating plants out once it has taken aggro of a player.
Attacks
| Attack | Description |
|---|---|
| Man-eating Hail | The man-eating plants on its back lunge forward trying to hit the player. |
Strategy
The man-eating plants on its back share their health with the Spriggan, allowing for multiple hits with each attack, however the plants each have their natural high defences and resistances (barring electricity).
As soon as the plants retract to its back there's a moderate window of time where you can hit it without danger, be sure to run as soon as the plants start coming back and you will have enough time to get away.
Another, easier strategy is getting +3 poison resistance. This makes the Hero immune to poison damage, which accounts for a majority of the damage, allowing them take less damage when eaten by plants and deal continuous safe damage.
The plants also will eat smaller enemies like the Springann archers. Therefore one could gamble allowing the archers to remain alive in order to distract the attacks of the man-eating plants.
Freeze also works well to temporarily halt the hectic movements of the plants.
The Spriggan boss before taking aggro
The plants on its back trying to reach the player


Greater Wisp
The Greater Wisp is one of the three bosses to spawn in the The Forest.
It has around 250 HP.
Behavior
The Greater Wisp is usually in an area with large open space, but will phase through obstacles.
Attacks
| Attack | Description |
|---|---|
| Wisp Belt | The Greater Wisp summons wisps until it's surrounded by them. Killing the wisps in this phase will only cause the Greater Wisp to summon more of them. |
| Wisp Flurry | The Greater Wisp moves towards the player, while its belt of wisps grows in radius and spins. |
| Wisp Launch | The Greater Wisp launches the wisps in its belt at the player one by one in clockwise order until it's out of wisps. |
Strategy
Be careful when fighting in melee range, as wisps will deal a large amount of damage in succession. It's best to fight it from long range. However, one method one can use is trying to proc continues Freezes on the Greater Wisp. The Wisp cannot summon more wisps while it is frozen.
Because of its ability to phase through terrain, it is best to fight the Greater Wisp on a fall through platform instead of any thick terrain that does not allow fall-through. This is because the Greater Wisp will always keep distance as far out from her so her wisps will hit, but her full body remains too far away from the player for its melee attacks. Therefore, try to keep the Greater Wisp in a position that you can easily reach its center to attack it (if using melee attacks/freeze proc strategy).
Wisps being launched

Necromancer
The Necromancer is one of the three boss's that spawn in the Catacombs HP: 200 (around 180-250)
Behavior
Will follow the player with wall phasing ability, cannot be hit while he's moving.
Attacks
| Attack | Description |
|---|---|
| Summon Skeletons | The Necromancer Summons around 4-6 Fighter Skeletons each has 20 HP |
Strategy
Right after Alerting the boss and grabbing his attention, make sure to run to a previous area with no monsters (also no spike traps recommended) wait for a while until he follow's you with his wall phasing ability, try to get at least 2 strikes on him, then retreat and repeat Do not! try to kill his Summoned Skeletons he will just summon more and more leaving you no time to go anywhere near him to land a strike and the skeletons will disappear by themselves.
Abomination
The Abomination is one of the three boss's that spawn in the Catacombs HP: Unknown (around 300-400)
Behavior
Spawns Mutant Cords that allows flexible mobility to the boss, Follows the player, unlike most bosses, it's able to follow and reach the player in almost any tile that the player can stand on, spawns 4 spinning spiked balls circling around it.
Attacks
| Attack | Description |
|---|---|
| Emerge! | The Mutant charges at the player, hitting the player with his circling spiked balls |
| Spiked Shot | The Mutant Launch's each of his spiked balls into the player with not much delay (unlike the Greater Wisp Boss) each dealing heavy damage, and Respawning more spiked balls After |
Strategy
Retreat to an open area, Wide areas works best against this boss, if the boss couldn't get close enough to the player in a while, it will stop and try to shoot its spiked balls , the animation takes place around 2 second after it stops, giving you the time to strike him once or twice, retreat and dodge the launched spiked balls and counter attack with another strike or two, retreat and repeat
The View Of a Sleeping Mutant, unaware of the player

The Zombie Dragon
The Zombie Dragon is one of the three boss's that spawn in the Catacombs HP : unknown
Behavior
The Zombie Dragon is a Flying mob, which gives him enough mobility around the battlefield to Chase the player in almost any area, Positions itself based on what attack it's going to do, Has Similar attack patterns to the Dragon in the Dark Caves
Attacks
| Attack | Description |
|---|---|
| Emerge! | The zombie dragon charges at high speed at the player dealing damage on impact, also releasing a shockwave similar to the Dark Cave's Dragon boss's stomp attack, Jump to avoid damage. |
| Explosive Flame Bolt | Charges for 1 Explosive Flame bolt that explodes when hitting the player/ground |
| Explosive Flame Thrower | The zombie dragon Charges to release 6-8 Explosive Flame bolts that are shot randomly around the area the dragon is facing |
| Homing Explosive Flames | The zombie dragon Charges to release 6-8 Explosive Flame bolts that highly follows the player |
Strategy
Just after the boss fight begins, retreat to a better positioning with no spike traps nor monsters and stay tuned for The Zombie Dragon to start his Emerge! attack animations. Jump upon his impact to avoid shockwave damage and counter attack quickly, then hide behind a wall at least 2 tiles tall fight to avoid damage.
The fireballs do not deal damage when the Hero has +3 fire resistance. This guide previously advised that the fire shield spell makes players immune to the Dragon's fire attacks, but that is no longer the case.
The Zombie Dragon sleeping before the boss fight
Typical Boss Fight arean for better player mobility


The Behemoth
The Behemoth is one of the three bosses you'll encounter in the last area of the game.
Behavior
The Behemoth is composed of three body parts: one head and two hands. The Behemoth will attack with both of its hands until they are both destroyed. When they are, the Behemoth will lower itself, giving you an opportunity to attack its eye before rising up again.
Attacks
| Attacks | Description |
|---|---|
| Ground pound | The Behemoth will use one or both of its hands to smash the ground, which will create a Shockwave to the right and the left. |
| Hand charge | The Behemoth will rapidly throw one of both of its hands at the player. Once the charge is over, the hands will hover back near the head of the Behemoth. |
| Lightning | The Behemoth claps both hands together on your character, causing balls of lightning to appear, dealing lightning damage straight down after a short delay. |
Strategy
High mobility is of the essence in this fight. The Behemoth's attacks are few but pack a punch and can be difficult to avoid.
Having double jump, high jump or even triple jump can make jumping over the shockwaves of the ground pound an easy task as well as allow you to jump up to the Behemoth's eye to start attacking it early (do mind the falling damage however).
Speed is also desirable as it makes it easier to get out of the way of the Hand charges.
The Behemoth's eye is also fairly tanky, so be prepared for a long fight.
Tips and extra information
- A good general strategy against bosses is using bombs as they generally deal enough damage to make the fight significantly easier.
- Bosses are unaffected by spike traps and will destroy them if they stomp on them.
- Boulder Traps deal 20 damage to bosses.
- Most bosses are significantly easier to deal with if you clear all the enemies of a level.
- Sometimes a bosses is too powerful for your gear. In these cases, look for hard counters to the specific boss of your level.
- If you can't see any chance of victory against the boss, an alternative strategy is clearing the other enemies of the level in order to gain enough XP to level up, allowing you to skip the boss entirely. However, this will cause you to miss out on any loot from the treasure chest.